 Pin It
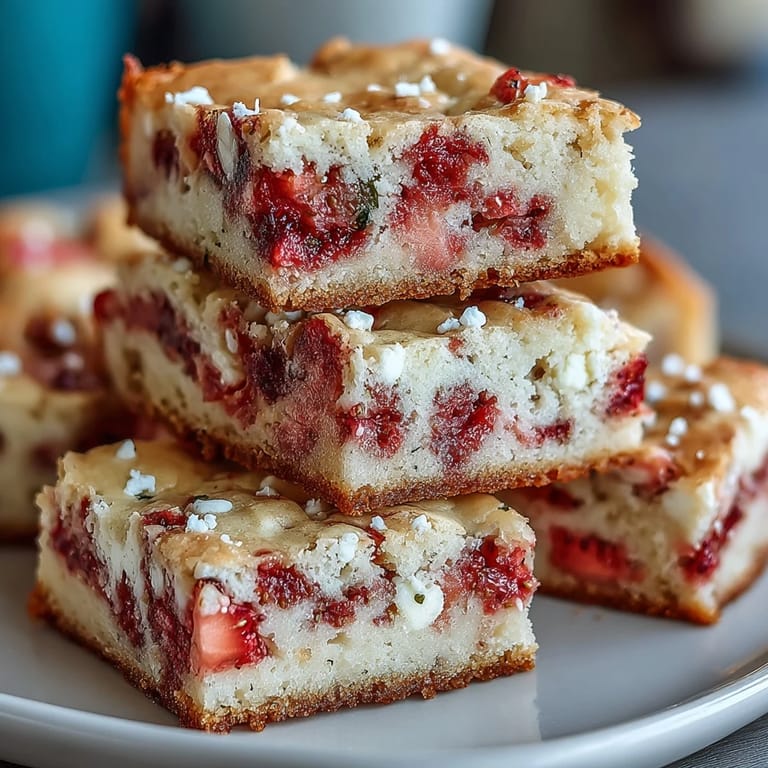
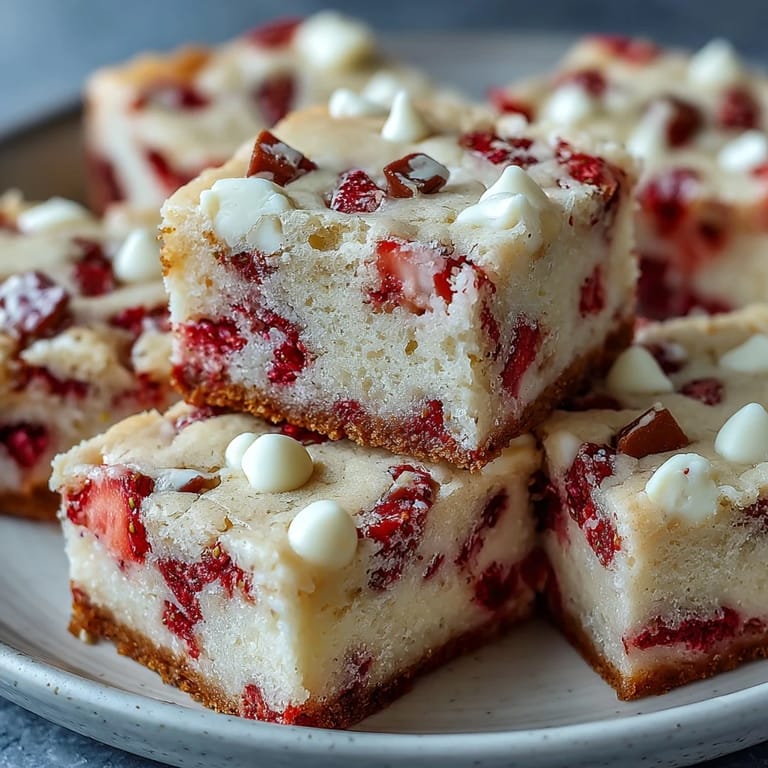
 My neighbor showed up at my door one June afternoon with a basket of strawberries so perfect they looked almost artificial, asking if I could turn them into something that wouldn't spoil by evening. I'd never made fruit-studded bars before, but something about the urgency and those berries sparked an idea—what if I tucked them into buttery cookie dough with white chocolate? Two hours later, the kitchen smelled like a bakery, and she was stealing bites straight from the cooling pan.
Last summer, I brought these bars to a potluck where everyone was stressed about bringing something Instagram-worthy, and somehow these humble squares became the thing people kept returning to. A little kid asked for the recipe so his mom could make them for his lunchbox, which felt like the highest compliment I could receive—not fancy, just genuinely loved.
Ingredients
- All-purpose flour (2 cups): This is your base, and using the right amount matters—scoop and level rather than scooping and tapping the measuring cup, or you'll end up with dense, heavy bars that taste more like cake.
- Baking powder and baking soda (1/2 tsp and 1/4 tsp): These lift the dough just enough to keep it tender without making it cake-like, so don't skip either one or the texture gets too dense.
- Salt (1/4 tsp): It's easy to think salt doesn't matter in sweet things, but it actually brightens the strawberry flavor and balances the white chocolate beautifully.
- Unsalted butter (1/2 cup): Softened butter creams better and distributes evenly, giving you that tender crumb; cold butter will leave you fighting with lumps.
- Granulated and brown sugar (3/4 cup and 1/4 cup): The combination gives you structure and a subtle caramel note that complements strawberries in ways white sugar alone can't.
- Egg and vanilla extract (1 large and 1 tsp): These bind everything while vanilla adds depth that makes you wonder why the bars taste more interesting than they look.
- Fresh strawberries (1 cup, diced): Dice them small so they distribute evenly and cook down slightly, concentrating their flavor—large chunks sink and leave dry patches.
- White chocolate chunks (3/4 cup): Use actual chunks rather than chips if you can find them, as they melt less aggressively and stay creamy instead of turning greasy.
Tired of Takeout? 🥡
Get 10 meals you can make faster than delivery arrives. Seriously.
One email. No spam. Unsubscribe anytime.
Instructions
- Set your stage:
- Preheat to 350°F and line your 8x8 pan with parchment paper, letting it hang over the edges so you can lift the whole block out later—this one small step saves you from crumbling bars all over the pan.
- Mix your dry team:
- Whisk flour, baking powder, baking soda, and salt in a medium bowl, making sure there are no little pockets of baking soda hiding in the corners where they'll taste bitter.
- Cream the butter and sugar:
- Beat softened butter with both sugars for about 2 to 3 minutes until it looks light and fluffy—this aerates the dough and is the secret to bars that taste tender rather than dense and heavy.
- Add your wet ingredients:
- Drop in the egg and vanilla, mixing until everything is pale and combined, which usually takes about a minute of beating.
- Bring wet and dry together:
- Gradually stir the dry ingredients into the wet mixture, stopping as soon as you don't see any white streaks of flour—overmixing at this point develops gluten and makes bars tough instead of tender.
- Fold in the stars:
- Gently fold in the diced strawberries and white chocolate chunks using a spatula, being careful not to crush the berries or break up the chocolate too much.
- Spread and bake:
- Press the dough evenly into your prepared pan and bake for 22 to 25 minutes until the top is golden brown and a toothpick comes out with just a few moist crumbs—this slight underbake keeps them chewy rather than cake-like.
- Cool with patience:
- Let the bars cool completely in the pan before cutting, which allows the crumb structure to set and prevents them from falling apart when you slice.
 Pin It
 There's something about pulling these bars out of the pan in one perfect rectangle, still warm and releasing that strawberry-vanilla steam, that makes you feel like you've accomplished something. It's one of those desserts that doesn't require special skills or exotic ingredients, just a little attention and the willingness to let fresh fruit do the talking.
Timing Your Bake Perfectly
The hardest part about these bars is knowing exactly when to pull them from the oven, because overbaking by even three minutes turns them from chewy to dry. I always set a timer for 22 minutes, check them, and then decide if they need the full 25—the center should jiggle just slightly when you tap the pan, which means the carryover heat will finish the job as they cool.
Strawberry Selection and Prep
Not all strawberries are created equal when it comes to baking—soft berries that are almost falling apart will disintegrate into the dough, while firm berries with a little tartness add brightness and structure. I've learned to squeeze a strawberry gently before buying and walk away if it feels mushy, because one soft berry in the bunch seems to ruin the whole batch by releasing too much liquid during baking.
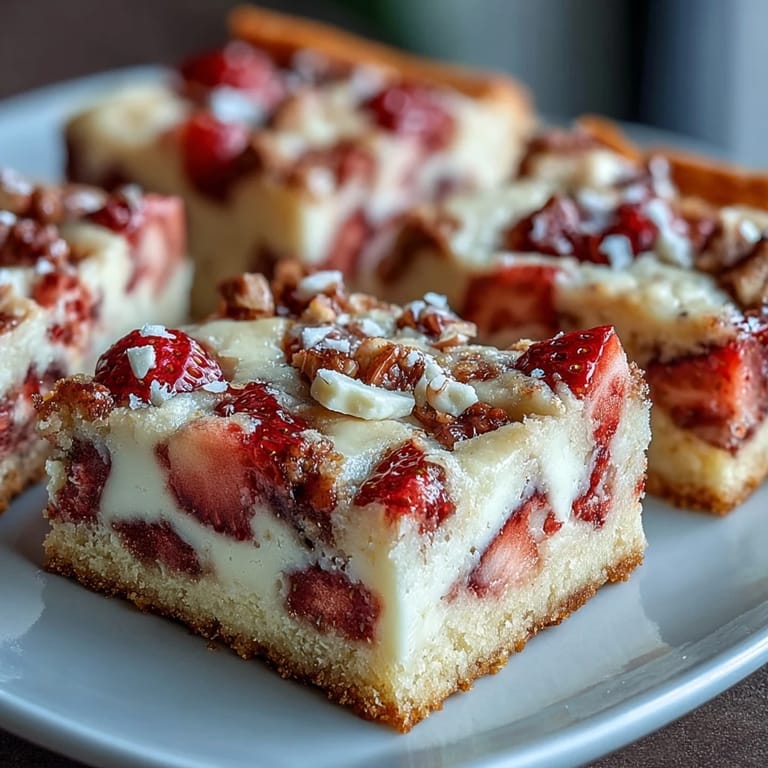
Storage, Variations, and Serving Suggestions
These bars keep beautifully at room temperature in an airtight container for up to three days, and honestly they taste even better the next day once the flavors have settled and melded together. You can swap dark chocolate or milk chocolate for the white chocolate if you're craving something richer, and I've even tried adding a thin glaze on top, though that feels unnecessary when the bars are this good on their own.
- Cut them into 16 squares using a sharp knife dipped in hot water and wiped between cuts to avoid dragging sticky dough around.
- Serve them slightly warm with a cold glass of milk or coffee, which somehow makes them taste even more indulgent.
- Pack extras in paper boxes lined with parchment to give as gifts—they're pretty enough to share and humble enough that everyone appreciates them.
 Pin It
 These bars prove that sometimes the best desserts are the ones that let their ingredients shine without asking for much in return. Make them once and they'll become one of those recipes you reach for whenever you need something that tastes homemade and feels like a hug.
Recipe Questions & Answers
- → Can frozen strawberries be used instead of fresh?
Yes, frozen strawberries can be used, but they should be thoroughly thawed and patted dry to avoid excess moisture in the bars.
- → What alternatives exist for white chocolate chunks?
Dark or milk chocolate chunks can be swapped in to vary the flavor profile according to preference.
- → How should these bars be stored?
Store in an airtight container at room temperature for up to three days to keep them fresh and soft.
- → What texture should I expect from these bars?
They should be soft and buttery with a moist crumb, featuring bursts of juicy strawberry and creamy chocolate.
- → Can the bars be prepared in advance?
Yes, these bars can be made ahead and stored properly; chilling them may enhance the flavors and texture before serving.